Sunday, November 22, 2015

Short Vowel Phonics Practice!

Wow... talk about a blogging hiatus! Ahhh, I haven't blogged since August! I am currently in my fourth year of teaching first grade. I just love those little learners and I LOVE teaching literacy. This year has been a challenging one for me so far. I have a group of students with very diverse needs: academic, social, emotional, behavioral. I love them all to death but these challenges have left me with very little "extra" time to work on my blog and show you what we are doing in the classroom. I love blogging and being a part of this wonderful online community of teachers, but when it comes down to it, my little kiddos come first. Now that we are 2.5 months into the year, my first set of report cards are completed, and I am figuring out what works for each of my little darlings, I am finding myself with a little time on this Sunday to update the ol' blog! Today's topic: SHORT VOWELS!

From the beginning of the year through December, my first grade team focuses on short vowel word families in our classrooms. We spend two weeks on each short vowel sound and the corresponding word families and we complete them in the following order: A, I, O, U, E. Over the past four years, I have created and compiled a variety of interactive materials for teaching short vowels. Some of the activities are things that I have created myself and I have bought some other fabulous resources from other TPT sellers.

Here are some of my favorites!

POETRY AND SONGS

To introduce every short vowel, we sing a silly song or read a short vowel poem at the beginning of the week. I write the poem on a piece of chart paper and we practice it all week. Then, we glue the song/poem into our reading notebooks. Students keep these notebooks in their book bins so that they can re-read these poems and review other phonics skills during Read to Self.

Here is an example of two of the poems that we practice for short vowels: one for short "a" and the other for short "o".


I did not write these poems. They are poems that I compiled from Pinterest. I have them available for free in my TPT store. Click this link to download a set of 17 poems!
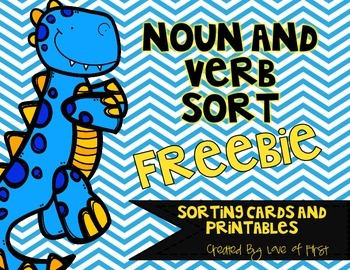
WORD SORTS

In our notebooks, we also complete word sorts for each short vowel. After sorting the words, my students practice reading the words "down the columns." This is the simplest way to read the words because they are sorted by word family. After they master reading the words, the students are challenged to read "across the rows." This is tougher because they must switch word families for every word.

Here is an example of our sort for short "i."


These are NOT fancy, by any means, but they do the trick! Download a word sort for each short vowel for free by clicking this link.

My students LOVE word sorts. We also sort word family words during guided reading.


These larger cards are GREAT for small group and whole group practice. We also use these in our pocket chart as a whole group!


It is amazing how simple and versatile these cards have been this year. I use them all the time and they were extremely simple to prep. I've even sent copies of them home with my intervention students to cut out and practice at home.  Grab these word sort cards in my TPT store!


WORD FAMILY TEXTS

One great purchase that I made on TPT is Jessica Tobin's Vowel Books (click the link to be taken to her TPT store). They are fantastic! She has a printable text for each short vowel (and long vowel) and the best part is that they are differentiated! For example, there are three versions of the Short A book - a beginner, a middle level, and more advanced text. This way, all of my students can practice a short vowel book, but it is appropriate for their reading levels! I highly recommend these!

Here is what the Short A texts look like. On the right, you will see the "unfolded" version of the moer advanced text. So simple to prep. Just print and fold!


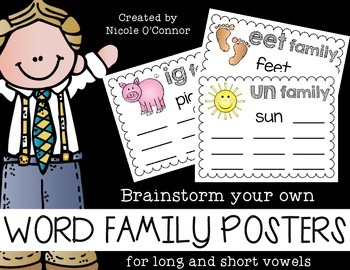
I also developed some simple word family books! They feature words in a common word family and then use those words in short phrases/sentences so that students get practice with reading the words within text. I use these as a warm up with my lower readers during guided reading during our first week on each vowel. I have them laminated and bound in my classroom library so that students can read them as well.


In addition to the large versions of these word family books, I made smaller versions on rings. These are great for sending with reading volunteers or they can be hung on hooks in the classroom for early finishers. I even send them home as extra practice in my intervention students' reading bags.


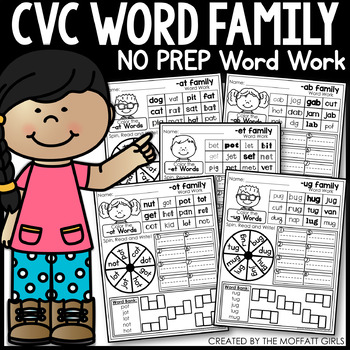
EARLY FINISHER/ WORD WORK ACTIVITIES:

Finally, a few of my favorite activities for early finishers! These are super interactive and my students LOVE them! Click the titles to download.

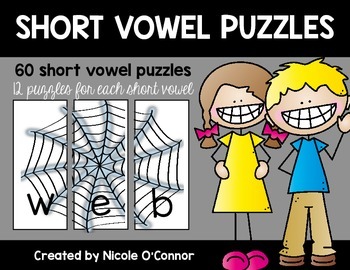
Short Vowel Puzzles:


Word Building Mat for Short Vowels:


Bingo Dauber Activities:


I hope that you enjoyed this peek into short vowel phonics instruction in my classroom!

Wednesday, August 5, 2015

Inform vs. Overwhelm: How to Provide Information to Parents at the Beginning of the Year


Last night, I posted a photo on Instagram of some of the documents that I was prepping for Open House and Back to School. Several people requested a blog post about what I send home with parents at the beginning of the year and here it is!! These documents have been a work in progress for me over the past three years and many of my ideas come from other teachers.

When I start planning my handouts for back to school, I always start with the mindset "Inform. Don't Overwhelm." I want to give my families the information that is necessary for the beginning of the year, but I don't want to overwhelm them. I figure that people are more likely to read and remember what I write if it is brief and informative. I had a professor in college who collected everything that was sent home in her elementary-aged son's folder throughout an entire school year. She brought the box into our education class and threw the papers all over the room. We sifted through the papers and so much of it was JUNK! Her point was that if we want parents to be involved and supportive, we need to be very conscious of what we are sending home. DON'T overwhelm them or give them too many flyers, just give them the info that they need to start the year successfully.

Okay, so let's get to it. I send home information in three chunks... A letter to families that I send to each student's home in August, a packet of information at Open House (before school begins), and additional information at parent-teacher conferences in October. I've added links to some of my handouts throughout this blog post that you can grab for free. I also use handouts created by Cara Carroll at the First Grade Parade. Here's a link to her blog post about Back to School Night.

My Welcome Letter:


These three documents go into an envelope and I mail them to families about two weeks before school begins. I send a brief letter introducing myself, a permission slip for our class website, and a reminder sheet about Open House. I send the permission slip about the class website because parents can check it out before Open House, if they are interested. Many parents even return the permission slip to me at Open House. Here's a link to my class website permission slip.

Open House:


At Open House, I stick an extra desk in the hallway outside my door with a welcome sign, Open House checklist, some pencils, and our class puma. The checklist tells parents what to complete in the classroom before leaving.


On each student's desk, I have a little welcome bag for them with a few treats, a pencil, and an eraser.

For families, I have a 6in by 9in manilla envelope with each child's name on it. The envelope contains all of my Open House documents for parents. The label also tells parents which papers need to be returned to school. Here's a copy of my labels. I stick them on the envelopes with two-sided tape.


Here's what each envelope contains:


Things to Know for the Beginning of the Year: This is a front/back document with the essential back to school info including information about take home folders homework, puma packets (basically at home reading practice), nutrition break, student birthdays, and sharing.


Getting to Know your Child Form: A basic questionnaire that parents fill out about their child. (included in Cara Carroll's Meet the Teacher document- see blog post here) I also print this one back to back.


Lend a Helping Hand Parent Volunteer Form: I send a form home for parents to fill out if they are interested in volunteering in the classroom. It gives them specific options to pick from so I know how they are interested in helping. Here's a link to download the volunteer form for free. (This was also Cara Carroll's idea that I re-created several years ago... just want to give credit where credit is due! She just has the BEST stuff!)


A Class Schedule: Many parents request this, so I just send it right away.


Okay, so that pretty much wraps up the information that I provide parents with at Open House.

I'll leave you with a photo of my favorite part of Open House... taking each student's picture with our class puma. The kids LOVE him! He becomes a very special friend throughout the year.
Oh, I can't wait to do this all again!! Comment below if you have any great Open House or back to school communication tips!!

Sunday, July 26, 2015

My Favorite Things Giveaway

Oh my gosh. I am so humbled by all of the support I have received from this fabulous TpT teaching community. I just LOVE sharing resources and collaborating with other teachers. This past week, I reached a personal milestone of 1,000 followers on TpT. I am simply blessed and I wanted to celebrate by planning a giveaway!

I LOVE creating gift baskets for different events and holidays. I decided to put together a cute little "My Favorite Things Care Package" for one lucky winner. Who doesn't love getting a fun package with goodies in the mail???


Including a fun scarf with matching earrings, 2 nail polish colors, to-do list notepad, patterned file folders, glitter pencils, and MORE!

To enter, simply complete the Rafflecopter at the bottom of this blog post... it's super quick and easy! Share this image out on Instagram and Facebook to help spread the word! Enter by midnight on Monday, July 27. One lucky winner will be announced on Tuesday! I will put the care package in the mail by early-mid August... just in time for back to school!

As part of my celebration, my TpT store will be discounted 20% on July 26 and July 27. Grab those must have back to school items!! Here's a link to my store!

  a Rafflecopter giveaway

Thursday, July 16, 2015

Daily 5: The key to an interactive Word Work Round


Welcome to my third post in my blog series about Daily 5. I hope that you enjoyed my other posts about how to get set up before the year begins and Read to Self. If you missed them, click these links to get caught up - How to Get Started with Daily 5 and Daily 5: Setting students up for Read to Self success.

Now, I want to put this out there right away and I said this in my other posts as well, I am in NO way affiliated with "the sisters" or the Daily 5 on any official platform. I think that the sisters are FANTASTIC and I highly recommend buying the most current Daily 5 book. But me? I am simply a first grade teacher who utilizes the Daily 5 framework and I have adapted it to meet my own needs.


Okay, today I am writing about my ABSOLUTE FAVORITE part of Daily 5. It is definitely my students' favorite as well. I have ALMOST ZERO behavior/management issues during this Daily 5 round and I attribute that to the interactive (As Fancy Nancy would say.... Interactive is a fancy word for "FUN.") nature of word work. For me, setting up Word Work is much simpler than other rounds of Daily 5, especially in the first few weeks of school.

I begin word work on the Monday of the second week of school. I begin by introducing our Word Work I-Chart.


After introducing the I-Chart, I like to introduce our first week of spelling words. Our first grade team has developed our own spelling lists, which consist of 7 word family words and 5 sight words each week. I have them available for FREE on Teachers Pay Teachers if you are interested in grabbing them- each week includes a spelling list to take home, spelling homework, a few practice pages, and a set of word list cards for the classroom. This is 27 weeks of spelling... We do a few review weeks throughout the year or have themed word lists around holidays which are not included in these sets... that's why it's not quite a full school years worth of spelling.

From these sets, I have word cards that my students use during word work (on the left of the photo). These word cards really come in handy because I allow students to choose a spot in the classroom for word work. They can bring their words with them anywhere! It is especially handy when you have classroom volunteers or paraprofessionals who work with students. I can easily send our word list with them as well. I begin by showing my students how the word lists are set up and the difference between word family words and sight words. Depending on the word work activity, I sometimes ask students to use the sight words and sometimes the word family words. Most of the time, students are allowed to choose the words from the card that they would like to work on that day.

At the beginning of the year, I like to build a nice base of paper/pencil activities that the students become familiar with. I get the activities from this AMAZING FREE RESOURCE.... I like to develop the paper/pencil tasks first because the whole class can work on them at the same time. 


The other more paper-based activity that we start in the first few weeks of word work is interactive notebooks for phonics and word sorts. My students have a very general "reading notebook" where we put all of their phonics interactive notebook pages, reading response, etc. We study short vowels at the beginning of the year so I use The Sassy School Teacher's First Grade Phonics for Interactive Notebooks. Highly recommend!


I created my own Interactive Notebook pages for Long Vowels, which you can grab here.


For the first few days of work work, we continue to review the I-Chart and I have the students sit in their desks. I tell my class that when they show me that they know how to demonstrate the word work expectations, they will be allowed to choose a spot in the classroom. Usually after about a week or so, I allow students to start choosing spots- they can use clip boards and we use the arm length rule... They shouldn't be within arm length of another student in their chosen spots.

After a solid month of word work, when the students are comfortable and independent with about 5-6 of the paper/pencil word work activities, I introduce our WORD WORK BOARD. It is really important that students are familiar with the initial word work activities because this is also when I start pulling reading groups during word work so I am not as available to help with questions. From this point out, I usually introduce one new word work activity each week and the rest of the activities are things that my class is familiar with.


This word work board allows me to differentiate my word work for different leveled reading groups. It also allows me to create more interactive, hands on activities because only about 4-5 students complete each center each day. Therefore, I only need five sets of beads or stamps, etc. Students get to each word work activity throughout the week. Here's how it works. Every student in my class is doing word work at the same time, but they are doing different activities, depending on their assigned group. Each student in my class is assigned a color group (you'll notice on the far right, there is a little poster with each student's name and their color). 

The left side of the poster shows the day of the week. The top row shows the different work work options for the week. When students want to find their word work, they put their finger on the day of the week and follow it over to their color. From the color, they follow it up to the word work activity for the day. After 2-3 days of practice, students are good to go! The activities at the top of the poster are on Velcro so I can easily trade them out each week. I also have a few blank cards that I can write on with dry erase when I create a few center "on the fly." If you want to copy of these header cards, you can grab them here... they are definitely a work in progress for me since I am always adding new centers, but at least it's a start for you!

I have all of the word work activities sitting on the top of one of my classroom library book shelves. I can get all of the activities ready on Monday and then I am set for the week.


Okay, so that answers the question of how I set up word work in my classroom. Now comes the fun part... the actual activities!!!

Here is a snapshot of a few of our favorite activities. I blogged about each of these activities a few months ago so click this link to read about them : WILD ABOUT WORD WORK! LOTS of freebies here!
Okay, here I'm just going to start posting some links to activities that I use for word work!

I recently began making sets of literacy centers for each month of the school year. Here's a link to my September centers!


Sorting words in Pocket Charts: My students complete this as a small group!


Build a Sentence Word Work.... My students LOVE this one!


One element that I am adding to my word work this year is an interactive word wall... This is a very new creation for me and I don't even have it set up in my classroom yet. I cannot wait to use it this year!! The word wall will have student names and our sight words that we learn throughout the year (our students are required to spell the First 100 Fry words). Along with the sight words, I am going to include some Word Family Posters that I am going to have students create with me. I will also have additional activities that students will complete at the word wall for one of our word work centers. Here's a sneak peek at my resources.

The word wall letter headings:


The word family posters:


Each time I introduce a new word family. I plan to have my students help me brainstorm word family books to add to the word wall. I'm going to laminate these posters so that I can write on them with Vis-a-vis or dry erase markers.

Grab my word wall materials here: Ultimate Interactive Word Wall Materials and Activities


The word family posters can be bought separately from the word wall complete set by clicking this link.


I also use Cara Carroll's Rock Your Fluency materials as part of my word work centers!!


The Moffatt Girls' CVC Word Family Word Work.


Susan Jones' First Grade Grammar Activities and Printables!! So many fun, interactive activities in here!


Love of First's Noun and Verb Sort Freebie!


Okay, I know that I just totally overloaded you with links but I highly recommend checking them out. 

Thank you for stopping by to read about how I set up word work in my classroom. I hope that you found some good ideas to take with you!

If you have word work activities to share, please post a link to your own blog post or TPT products in the comments section of this post. I'd love for it to be a collaborative collection of ideas from myself and other teacher readers!!

On to the next post: Work on Writing!