Welcome to my second post in my blog series about Daily 5. I hope that you enjoyed my initial post about how to get set up before the year begins. If you missed it, click this link to get caught up -
How to Get Started with Daily 5!
Now, I want to put this out there right away and I said this in my initial post as well, I am in NO way affiliated with "the sisters" or the Daily 5 on any official platform. I think that the sisters are FANTASTIC and I highly recommend buying the most current Daily 5 book. But me? I am simply a first grade teacher who utilizes the Daily 5 framework and I have adapted it to meet my own needs.
Now, when I took to Instagram and Facebook, asking teachers what they wanted to know about Daily 5, soooooo many people mentioned how to build stamina with young readers. They wanted to know if young learners can be successful and independent. My answer to that is, YES! Now, when you are building stamina with your class, you have to walk that fine line between "very firm with expectations" and "sweet, positive encouragement."

Read to Self is the first element of the Daily 5 Framework that I introduce to my first graders. I start it on the third day of school, which has been the perfect timing for me. At Open House, students add a book to their book bin that they are excited to read in first grade. I really build up how excited I am about beginning Read to Self with my students on the first two days of school. By the third day, students are practically begging to read out of their book bins. Here is what my book bins look like - the blue ones along the top of the shelf (they are from Really Good Stuff). My entire elementary school uses the Daily 5 framework so our school purchased book bins for every classroom.
PREPPING BOOK BINS:
Let me say a quick word about how I prep the book bins before the year begins. My district used to use a Houghton Mifflin reading program so my classroom still has all of the hardcover textbooks that house student stories. I don't explicitly teach from the textbooks but they are filled with great stories for the students to read. I begin by putting one of the Houghton Mifflin books in each book bin. Our kindergarten teachers send us a list of our students names with their reading levels during the summer. I use this as an approximate of where they are reading. I know that some kids gain reading skills over the summer, some lose skills, and some stay pretty much the same. The reading levels that we get are not perfect, but at least it is a start. I put four leveled books in each students book bins. Then, like I said before, I allow students to add one "free choice" book to their bin at Open House with their parents (we have Open House before the school year begins).

When I started thinking about how to write this post, I went back to my lesson plans from the first two weeks of school last year. I also went to my Daily 5 book appendix, where the sisters very clearly lay out how they structure their first day of Read to Self. I decided to make my own brief chart of my first 5 days of Read to Self.
Here are two pictures of the charts. I also saved them as PDFs so that you can easily print them as a "quick reference." Click here for the
Launching Read to Self PDF. Below the charts are a more in-depth look at the first five days. Now, this is the process that has worked well for me. Feel free to comment at the bottom of this post if you have other tips to share with readers.
Okay, here is a more thorough look at my process of setting up Read to Self.
STEP ONE: THREE WAYS TO READ A BOOK
I begin introducing Read to Self by discussing "3 Ways to Read a Book." I use these fabulous FREE poster from A Year of Many Firsts...
click this link to download it for yourself!
I begin with the first TWO ways to read a book. (I save the 3rd way for later in the week so that the lesson doesn't get too long)
I used the 8.5x11 version of this poster for the last few years... but I am upgrading to the big one this coming year! Just need to tape the back together and laminate it at school!
Okay, back to my first Read to Self lesson. I begin with the text, Where the Wild Things Are. I find this to be the perfect book for introducing "read the pictures" and "read the words." It works well because it has only a small amount of text so it doesn't take forever to read. It also has very exciting, thought-provoking illustrations, which are great for modeling "reading the pictures."
I begin by modeling, Read the Pictures. I very carefully, slowly go through the story, page by page, and tell myself a story by talking about the pictures. I modeling my thinking process and I point out how slowly I am making my way through the book. Then I go through and read the words. We talk about the differences and similarities in the two different types of reading.
STEP TWO: INTRODUCE READ TO SELF I-CHART
Next, I introduce our Read to Self I-Chart.
The Sisters make their I-Charts with their students each year. I have tried that my first few years and I found that the brainstorming of the charts as a class became a very lengthy activity. I had some students that would start to "check-out" and several students with very extreme or silly ideas. I have found it better to have the chart prepared ahead of time. We simply go through each expectations and discuss about why they are important.
STEP THREE: CORRECT & INCORRECT MODELING
After discussing the expectations, I move my students into a circle on the carpet and have students model Correct and Incorrect Read to Self behaviors. We have a lot of fun with this and make sure to always point out the right thing to do. We talk about how incorrect behaviors hinder our learning and the learning of the kids around us.
STEP FOUR: INTRODUCE STAMINA
Stamina can be a very confusing word for first graders. I compare reading stamina to practicing how to ride a two-wheeler bike. Most kids don't just climb on a bike without training wheels and ride it on a long bike ride. The same thing happens with reading. We need to build up our reading slowly.
I show my students this Reading Stamina Meter.
Click here to download for free! I tell them that we will be building our stamina up to 2 minutes today and that if the whole class can follow all of the Read to Self expectations for TWO WHOLE MINUTES, we will fill our meter up to the 2 minute mark. They always think that this is extremely short and it is. However.... DO NOT rush it!!! Keep them excited and wanting to build stamina.
STEP FIVE: BOOK BIN SCAVENGER HUNT
Here comes another management tool that I have found to be successful with Read to Self. I have found that my students are more successful with building stamina when I choose their reading spots at the beginning of the year. However, I like to make it a fun game when they find their reading spots. I call it a Book Bin Scavenger Hunt. Before we discuss Read to Self, I "hide" all of the students' book bins around the classroom. These spots will be the students' reading spots for the first month of school. When we are ready to begin our first round of Read to Self, students go on a scavenger hunt to find their spots. It helps us to create excitement about our reading and it allows me to make intentional decisions about where certain students will be most successful.
STEP SIX: 2 MINUTES OF READ TO SELF
Once students have found their spots, I begin our classroom timer for 2 minutes. I have a computer and projector in my classroom so I project a digital timer on my whiteboard. I use the website, Online Stopwatch. They have lots of options for timers and it is a free website.
Click this link to check it out. Last year was my first year using a timer during Read to Self and I think that it really helped students track and build stamina.
Here's a look at what the website looks like... there are many timers to pick from. These are two of my favorites... Now they are nothing fancy, but they get the job done!
When you choose a timer, it looks like this on the screen. The one thing that I do not like about these timers if that they make an AWFUL noise when the timer reaches 0. I just mute my computer so that we don't hear it and then the timer will flash on the screen when the time has expired. I also had to train my class when I started pulling reading groups during Read to Self that just because the timer is finished, doesn't mean that you can just get up and put your book bin away. Occasionally I would run a minute long with my group and students would continue reading after the timer until I dismissed the class to clean up.
Simple and effective. Okay, enough about timers.
While your students are completing their first two minutes of Read to Self, make yourself busy. Go sit at your desk and pretend to not be watching. Students should be reading because they want to build stamina and do well... not because you are hovering over them, watching them.
I made the mistake of walking around and monitoring Read to Self during my first year of teaching while we were building stamina. My students were doing so well!! However, when we had built our stamina up enough that I could start to pull a small group during Read to Self, students started to fall apart and get distracted. I attribute a lot of that to the fact that while they were building stamina, I was watching them as a hawk.
Just because you are not hovering, does not mean that you are NOT secretly monitoring. If you notice ANY students breaking ANY of the expectations on the I-Chart, stop the WHOLE class and regroup on the carpet. After reviewing the I-Chart again, try another 2 minutes. I had to do this last year on our first day of Read to Self and I am so glad that I did.
Hopefully, your class will be successful with the first two minutes of stamina and you can have a student fill in your stamina meter. It is up to you if you want to do a second short practice or if you want to move on to something else.
OPTIONAL: INTRODUCE CAFE
After our first Read to Self, I like to briefly introduce our CAFE board, which is a collection of reading strategies. Here's a photo of mine at the beginning of the year last year.
The first strategy that I introduce is the comprehension strategy: making connections. We practice a "thumbs up, thumbs down" check in as I do a read aloud of
Wimberley Worried by Kevin Henkes. This is one of my FAVORITE books to read during the first week of school. We practice making connections to the story as a class and I usually write our connections down on a piece of anchor chart paper or on my whiteboard.
After the read aloud, my students complete a reader response focusing on the new strategy: making connections. In the response, students draw a picture of a time that they were worried and write a sentence. We use interactive reading notebooks throughout the year, so I like to have them put their response right into their reading notebooks. Since not everyone uses interactive notebooks, I made two versions of the reader response if you are interested (one for interactive notebooks and one as a handout).
Click this link to download them for free.
Okay, so that completes my first day of Read to Self and how I begin to introduce reading strategies on the CAFE Board.
Okay, Day 2 of Read to Self is pretty self explanatory based on my little chart above. The one thing that I will add a little bit of information about is introducing the 3rd way to read a book, Retell the Story. I pull out Where the Wild Things Are again and we talk about the first two ways that I demonstrated the day before. Then, I address the "retell the story" strategy for reading a book. I go through and verbally retell the story in my own words... similarly to "read the pictures." I take my time again and really go into detail with my story telling and analysis of the story as I am retelling.
Then, you will go through the process of reviewing the Read to Self expectations, modeling behaviors, and building stamina by adding another minute or two of reading time.
On to Day 3! Again, continue to review the I-Chart, the expectations, the ways to read a book, building stamina, etc. BEWARE that you are not building stamina too quickly. It may seem like they are "getting it" but I take it super slowly!
The other concept that I begin to discuss is Good Fit Books. To introduce, I read Goldilocks and the Three Bears and we discuss things that are a "good fit."
Then we start to compare that to books that we are reading. I keep this super simple and broad... My goal here is just to plant the seed of this idea. I continue to build on it over the next few days.
On the 4th day, I extend our thinking about Good Fit Books to discuss the concept that we read different books for different purposes. We compare it to need different shoes for different activities.
A Year of Many Firsts included this awesome activity in her set of FREE Daily 5 materials.
It is a great sorting activity to introduce the idea! The sisters bring in actual different types of shoes to use as examples, which sounds soooo fun! I may have to bring in actual shoes this year as well!
After this fun activity, we review our Read to Self I-Chart, discuss expectations, review the ways to read a book, look at our stamina meter, complete a round of Read to Self... adding only a minute or two to our stamina time from yesterday.
After we talk about different purposes of shoes (we did this on Day 4), we start to talk about different purposes of books. I introduce the first letter of the sisters' I PICK acronym for choosing Good Fit Books. P is for Purpose: Why do I want to read it? Now, there are three other letters to this acronym that I address as we continue to develop our ability to choose Good Fit Books. I only discuss Purpose in the beginning because I like to develop the idea fully. I have tried to introduce the other letters in the acronym along with the P, but my students started to lose interest. I find it more effective to spread it out.

For this part of the lesson, I present different books: a dictionary, a fairy tale book, a chapter book, a nonfiction book about rain forests, a book of maps, a math book, a cookbook, etc. I like to begin this portion by having students sit in a circle and just pass the books around the circle before discussing them as a class. Kids love taking 5 minutes to just talk about them freely with the kids next to them. It's a great "brain break" sort of activity.
After students have had a chance to look at the book and talk about them with their neighbors, we identify the purpose of each book and I start an anchor chart to document texts and their purposes (I don't have a copy of my chart from this past year so I can't post a picture yet -- I will try to post one in September when I do it again with my new class).
After discussing different purposes for reading, I have the kids try to identify a purpose for reading different books in their book bins.
Then we review our Read to Self I-Chart, discuss expectations, review the ways to read a book, look at our stamina meter, complete a round of Read to Self... adding only a minute or two to our stamina time from yesterday.
LATER THAT DAY:
On this day, I try to find time to help my students choose new books for their book bins.
My students have the following books in their book bins on a weekly basis:
1 Houghton Mifflin textbook with stories
4 Leveled texts at that student's independent reading level
1 Free choice book of that student's choice (often a picture book for "reading the pictures)
As the year continues, students also have:
Books from guided reading to continue to practice fluency
Fluency practice folders made from
Cara Carroll's Rock Your Fluency Materials
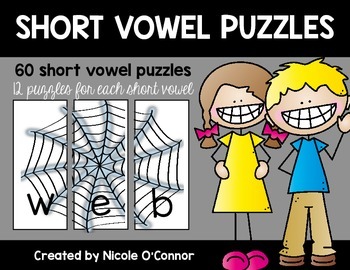
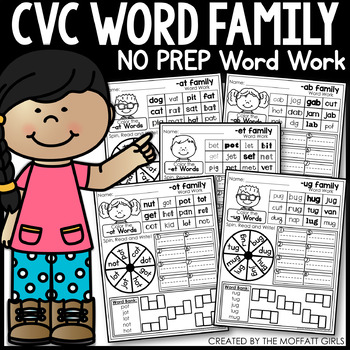
Printable sight word and word family readers (
grab the word family readers here!)
Here's an example of my word family readers. These are my Short I Readers. I like to laminate them and put them on rings for easy phonics practice. Click the photo to grab these for yourself! You can get them in the short vowel bundle or get specific short vowel sets individually.
To help students with the book selection process, I call kids over with other students that are at similar reading levels. I pull the Leveled Letter bins from my classroom library shelf that would be appropriate for them (usually the students' independent reading level and one letter below that level).
The students pick four books out of the letter bins that are on the carpet. Then, they can choose ONE free choice book out of any bin in the classroom library.
For the first few weeks, I supervise and assist with the book bin process but the students become very independent, very quickly. It is a process that works well for me and it helps me to ensure that students have appropriate leveled texts in their book bins.
WOW! Phew!
Now, this was a MONSTER post with lots of information about how I set up Read to Self. I continue to build stamina with the kids until we reach our 15 minute goal. When we reach 10 minutes, I begin to pull reading groups during Read to Self. I will write a post about my reading groups in the future... after I finish my posts about setting up the Daily 5 framework.
When we reach 15 minutes, we have a special "Read to a Stuffed Animal" day. I get down all of my stuffed animals (they are all from Kohl's and have making picture books). Students get to choose a stuffed animal to read with as a little celebration of our reading stamina.
I'd love to hear feedback from you about how you set up Read to Self in your classroom. Do you have any fun mini lessons about Read to Self?? Any great tips that have worked for you?? If you do, add a comment to this post to share with me and other readers!! I love getting tips from other teachers using Daily 5!!